Installing Debian on the D-Link DNS-323 and Conceptronic CH3SNAS
Overview
In a nutshell, the installation of Debian on your D-Link DNS-323 or Conceptronic CH3SNAS device works like this: you use the original firmware of your device to install a "firmware upgrade" which in reality contains the Debian installer. When you restart your device, Debian installer starts and allows you to login via SSH to perform the installation. Debian will be installed to disk and a Debian kernel will be put in flash that will start Debian from disk.
If you follow this procedure, Debian will be installed to your SATA disk and the original firmware in flash will be replaced with Debian and your disk will be erased. Since Debian is installed on disk, your machine will not boot without the disk. Debian does not install a web interface to configure your machine, although it's possible to install such software. Furthermore, the D-Link DNS-323 and Conceptronic CH3SNAS devices don't have a recovery mechanism that would allow you to load a firmware image via the network. If something goes wrong, you'll have to connect a serial console to access the recovery mechanism. Please proceed only if you want to replace your firmware with Debian and if you can make a serial console for your device in case there are problems. If you don't want to replace the original firmware in flash or retain the capability of booting without a disk, you can install a Debian chroot instead.
Status
Please note that the D-Link DNS-323 is no longer supported as of Debian 9 (stretch). You can still install Debian 8 (jessie) for some time after the release of Debian 9 but at some point in the future installer support will go away.
Requirements and Preparation
In order to install Debian, you need the following:
- A D-Link DNS-323 (revision A1 or B1; C1 is not supported!) or a Conceptronic Grab'n'GO CH3SNAS.
- An internal SATA disk in the device.
- A network connection.
- Another machine on which you have an SSH client. SSH is included in every Linux distribution as OpenSSH and there is PuTTY for Windows.
- While a serial console is not required for the installation, you have to be able to make one in case something goes wrong during the installation or later during the operation of Debian.
Making a Backup
You have to make a backup of all the data stored on your D-Link or Conceptronic device before starting with the installation of Debian since Debian will format the whole disk during the installation.
Starting the Installer
First of all, check in the original firmware that your network settings are correct. The Debian installer will use the same settings as your original firmware, so please choose either DHCP or configure a valid IP address, gateway and DNS.
Now you can go ahead and download the installer image to your PC. Please download the right image for your device:
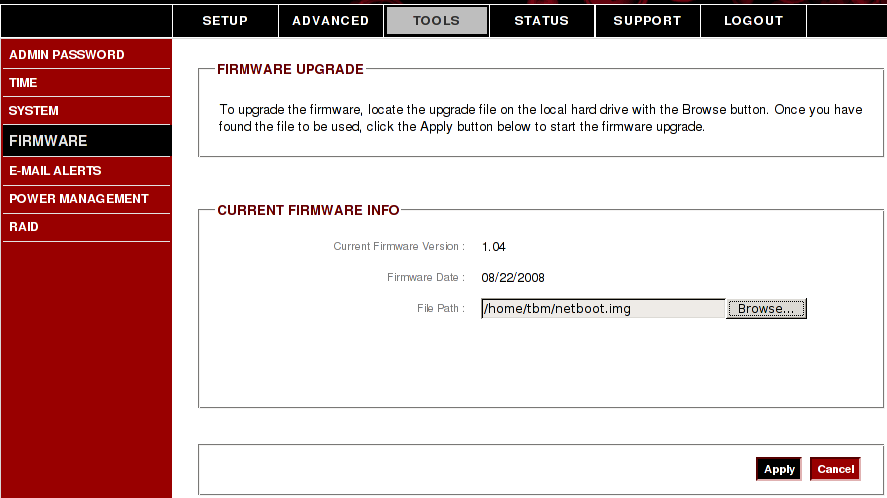
Now you can access the admin interface of your device with your web browser
in order to install the firmware image containing the Debian installer.
Log in as user admin (the default password is empty), go to Tools and
choose Firmware. Hit the Browse button and select the installer image
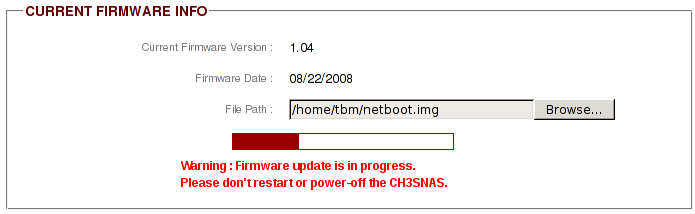
you downloaded before (look for netboot.img). Press Apply and the
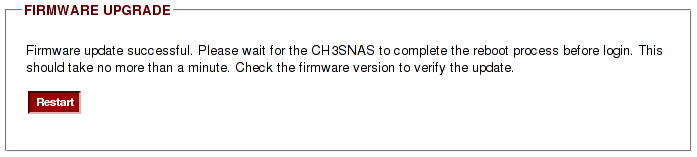
Debian installer will be written to flash. When the firmware update has
completed, restart your device. After a few minutes, you will be able to
connect to the Debian installer.
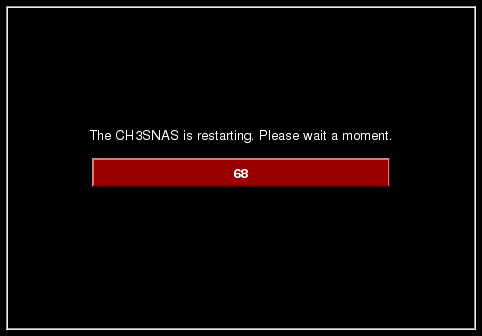
Here's what the firmware upgrade process looks like on the Conceptronic CH3SNAS:
The firmware upgrade page on the D-Link DNS-323 looks very similar:

The Installation
After you have flashed the Debian installer image and restarted your device, the Debian installer will start. Since the DNS-323 and CH3SNAS do not have any IO device, SSH will be used for the installation. The installer will bring up the network, start the OpenSSH server and you can then connect to the device using SSH. You have to wait a few minutes after starting the system before you can connect. Unfortunately, the installer currently doesn't use the LED to signal when it's ready, so you just have to wait a few minutes.
Since the DNS-323 and CH3SNAS do not have an LCD, the installer cannot tell you which IP address to connect to or which password to use. With regards to the IP address, the following strategy is used:
- If your original firmware is configured to use DHCP (the default configuration from D-Link and Conceptronic), Debian installer will try to acquire an IP address with DHCP. You can use the MAC address listed at the bottom of your device to tell your DHCP server to give out a specific IP address to your machine.
- If you configured a static address in your original firmware, this configuration will be used. However, if your network configuration was incomplete (e.g. IP address or DNS were missing), the installer will use DHCP instead.
- If DHCP is used but your DHCP server does not respond, the installer
will use the fallback address
192.168.0.32. This is the default IP address used by the D-Link firmware, but please note that it is different to the default IP address from the Conceptronic firmware. If you are unsure what the address of your device is, unplug the Ethernet cable, start the machine again, wait until Debian installer is ready for SSH and then plug the cable back in and connect to this fallback address.
Please make sure that your device is on a local network to which only you
have access since the installer uses a very generic password, namely
install. The user is installer. Connect to the installer (again,
replace the address in the example with the actual IP address of your
device):
ssh installer@192.168.1.100
Important note: When you connect to the installer, one of the first
screens will allow you to select additional installer modules. Make sure
to select the ext3 module. If you don't select the ext3 module, the
installer will not work correctly due to a bug.
The installation itself should be pretty standard and you can follow the installation guide. The installer knows about the DNS-323 and CH3SNAS and at the end of the installation it will flash a kernel and ramdisk that will automatically boot into Debian.
Since your device boots from flash you don't have many limitations as to how you partition your hard drive. You can use LVM and RAID and a number of filesystems.
At the end of the installation, the installer will write the new kernel to
flash. Afterwards you will get a confirmation that the installation is
complete. Confirm, wait for the installer to finish and once your SSH
session terminates, wait a few minutes before you can connect to your newly
installed system via SSH. You will be able to log in as root or your
newly created user.
Success
You should now have a complete Debian system running on your DNS-323 or
CH3SNAS. You can use apt and other tools to install additional
software. The D-Link DNS-323 and Conceptronic CH3SNAS are ARM based
devices and the armel architecture is fully supported by Debian.
Finally, make sure to read the tips and tricks about running Debian on the D-Link DNS-323 and Conceptronic CH3SNAS. In case you run into any bugs or problems, you may want to check the list of known issues and bugs.