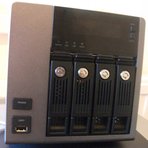
Serial console for QNAP TS-41x/TS-42x
If you want to connect a serial console to the QNAP TS-41x/TS-42x, you'll need a TTL to RS-232 level shifter. Unfortunately, there are several revisions of the TS-41x/TS-42x mainboard that behave differently in terms of the serial console.
Once you have connected your serial console, you can use a terminal emulation program to connect to U-Boot, the boot loader used by this device. You have to connect with 115200 baud and set the parameters to 8N1 (8 data bits, no parity, 1 stop bit). U-Boot on a separate page about U-Boot.
On my TS-419P+ (unknown revision of the board since I don't have this device anymore), the serial connector is marked as CN1 and is of type JST PHR-4. You need a 3.3V TTL to RS-232 level shifter. The pin layout is as follows (from the top to the bottom):
- TX
- VCC
- RX
- GND
Note that you have to add a jumper to JP1 for the serial to work. On the TS-419P and TS-419P+ (and probably all other devices), the LCD cannot be used when the JP1 jumper is set (i.e. the jumper selects between the serial console and the LCD). You also have to disconnect the LCD cable that goes to the connector right next to the serial connector.
The TS-419P+ with revision V1.4 and QV20 V1.2 mainboards use 5V rather than 3.3V. The APU jumper needs to be set. The pin layout is as follows:
- TX
- VCC
- RX
- GND
The TS-419U+ with QU43 V1.3 mainboard has a connector labelled "CN3 / CONSOLE" and the pin lay is:
- TX
- VCC
- RX
- GND
The jumper is called PSU but it seems to work without setting the jumper.
If your serial console doesn't work or you can see text but your typing is ignored, it might be because you have to connect RX from your connector cable to TX on the QNAP and TX with RX.