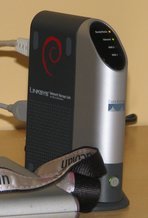
Tips and tricks about Debian on Linksys NSLU2

Controlling the LEDs and beeper
You can use the tool leds to control the LEDs and beeper. Typing leds
without any arguments will show a help screen.
To control the beeper, you can also install the beep package and then
run:
beep -e /dev/input/event0
beep can do a lot of things. For example, the following command will result in three beeps:
beep -e /dev/input/event0 -f 220 -l 500 -d 500 -r 3
Use power button to shut down system
By default, Debian will reboot the NSLU2 when you press the power button.
If you want your NSLU2 to shut down when you press the button, you have to
edit /etc/inittab. Look for a line like this:
ca:12345:ctrlaltdel:/sbin/shutdown -t1 -a -r now
and replace -r now with -h now. Make sure to run the following command
to reload the file:
telinit q
Upgrading Debian
Here are some notes regarding upgrades of Debian:
- Make sure to read the release notes. In particular, follow the chapter on upgrades from Debian 7 which explains the upgrade process in great detail.
- Make sure to remove the package
apt-xapian-indexfrom your system before the upgrade. This package requires substantially more RAM than the NSLU2 has and will cause your upgrade to take 24 hours or more!
Using UUIDs to reference disks
Debian 5.0 (lenny) uses names like /dev/sda1 to refer to your disk but
there is no guarantee for device ordering with USB devices. This means
that when you connect a second drive, your sda device might (or might
not) become sdb, causing Debian to fail to boot because it's trying to
access the wrong drive.
The solution for this problem is to disconnect the second drive, boot into
Debian and convert /etc/fstab to use UUID (a unique ID for each
partition) or LABEL (a name for each partition) instead of device names.
To use UUID, do the following to find out the UUID for each partition
(we'll use sda1 in the example):
cd /dev/disk/by-uuid
ls -l | grep sda1
[...] 683dbecd-1669-4210-bf29-fde6187261ba -> ../../sda1
Now edit /etc/fstab and replace the entry for sda1 with the UUID:
UUID=683dbecd-1669-4210-bf29-fde6187261ba /boot ext2 defaults 0 2
You have to do the same for all partitions listed in /etc/fstab.
Finally, make a backup of your flash and then generate the initramfs. This
is necessary because the name of the root device is stored in the
initramfs.
cat /dev/mtdblock* > nslu2-backup
update-initramfs -u
Make sure you do this with only one disk connected. When Debian boots successfully with one disk using UUID, you can go ahead and add the second drive.
By the way, when upgrading from Debian 5.0 to 6.0, the upgrade process will
automatically convert your /etc/fstab to UUIDs. However, the tar ball of
Debian provided here still use /dev/sda1-style names.